Guide
Agent database
Once you write and approve a to-do, an agent running on your Mac changes the code and leaves the result as a PR or a merge. This guide covers the initial setup and how a single to-do is handled from start to finish.
Get started
Create an agent database
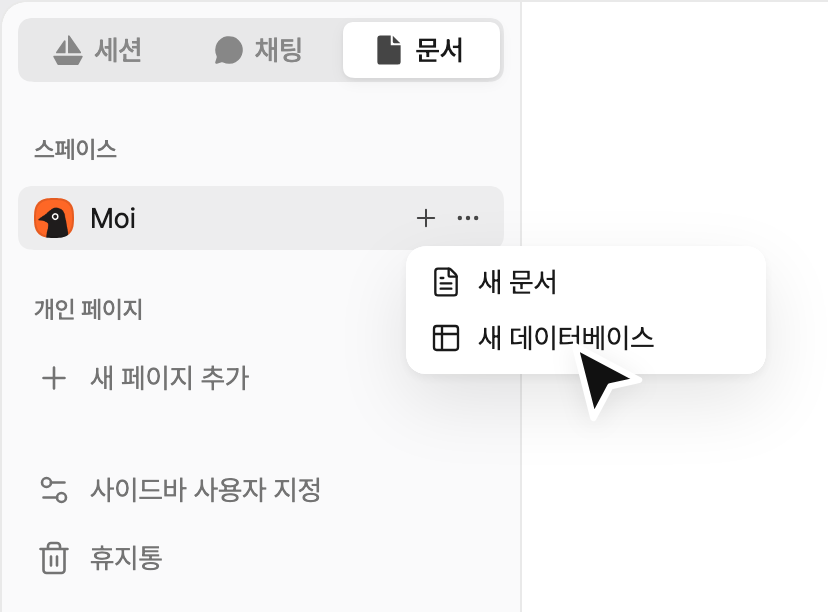
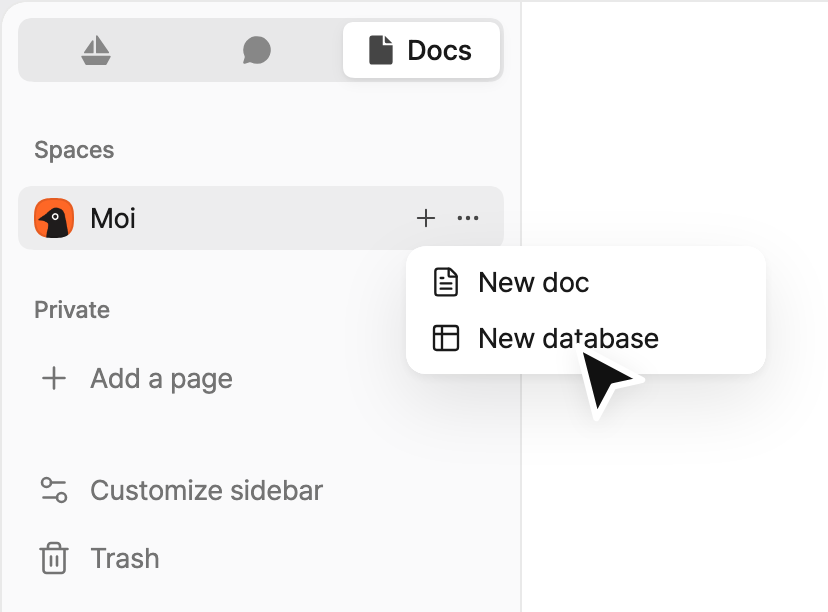
In the sidebar, open the Docs tab, hover over the space name, click + and select New database. If the space is empty, click New database directly below the space.
Only space admins can create an agent database.
In the window that opens, proceed as follows.
-
Select Agent database.
-
If the space has no GitHub repository yet, connect GitHub and select repositories. If it already has repositories, this step is skipped and all of them are assigned to the agent.
-
Select an approval policy and click Create. An Agent database is created along with three sample to-dos and an agent guide.
Turn on your agent
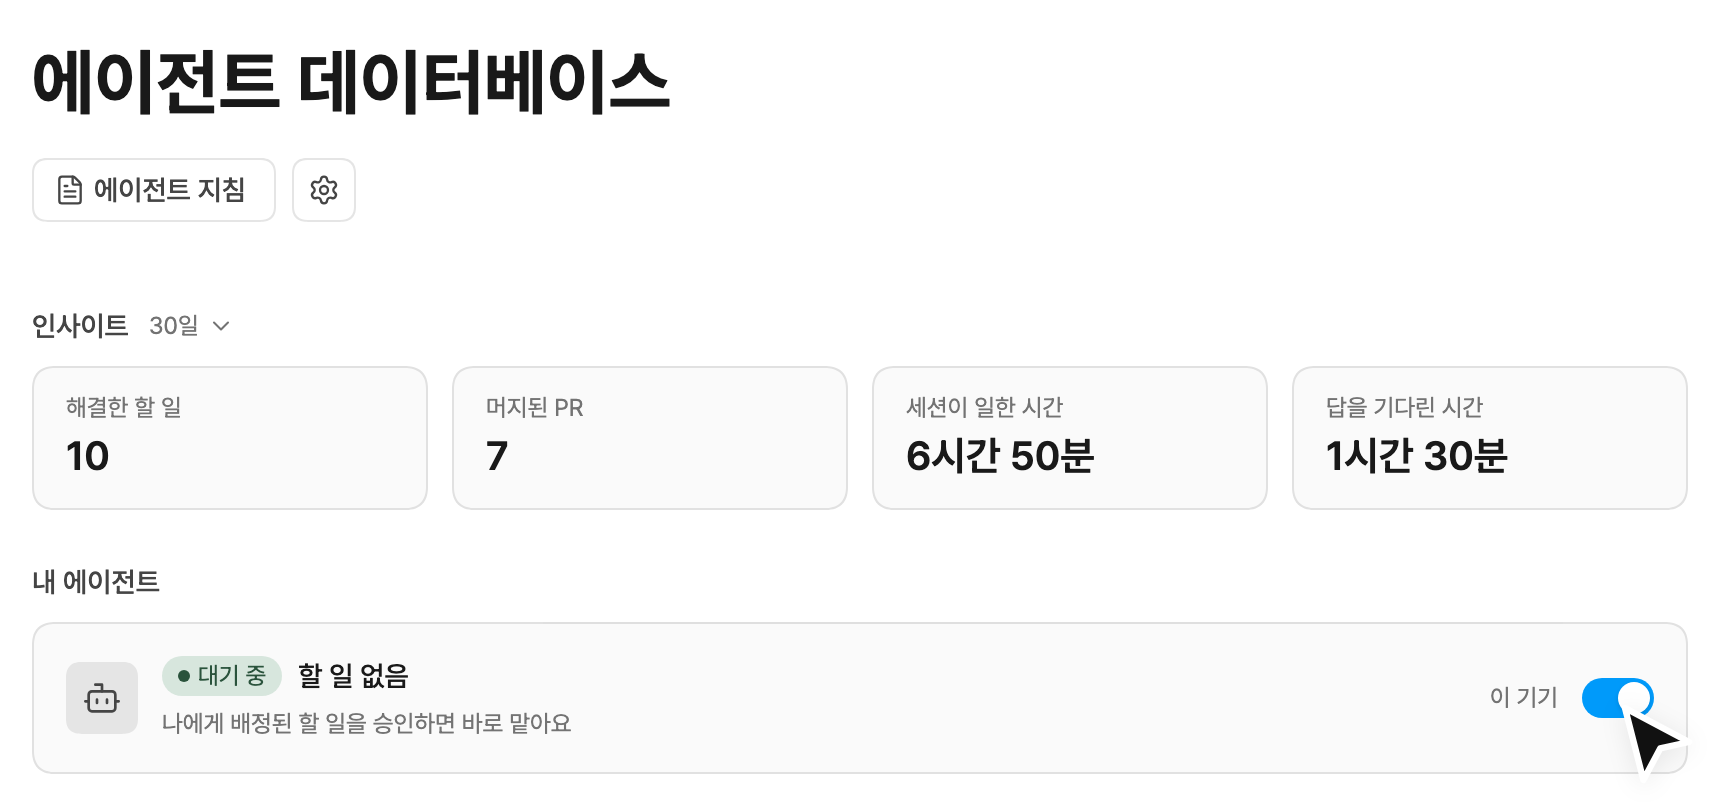
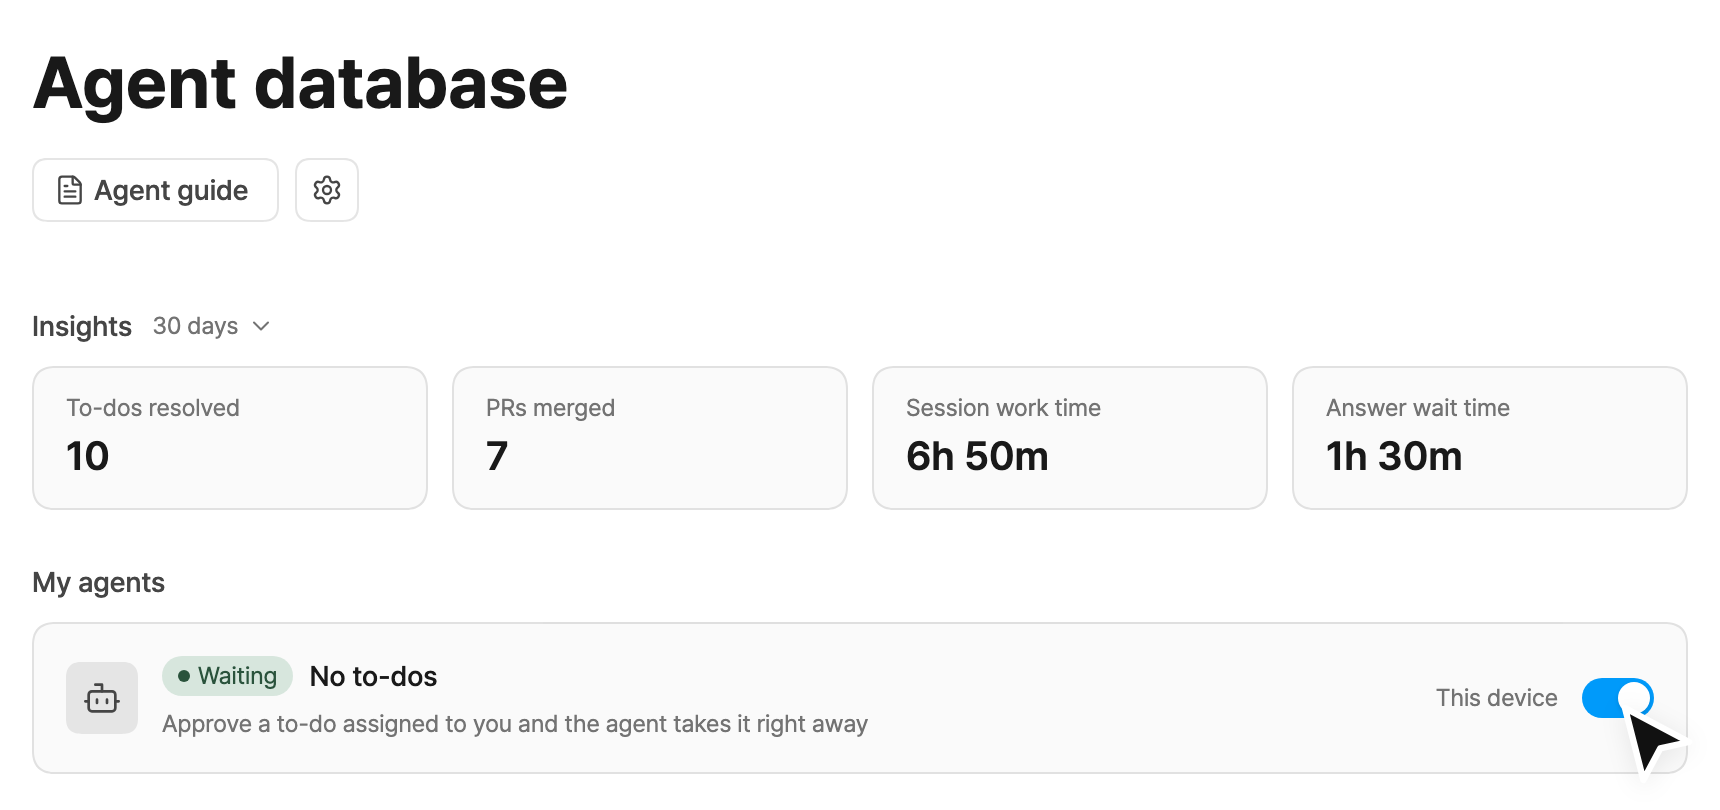
Each user turns on their own agent on their own Mac, once. The Agent guide button, the settings button and My agents are at the top of the database.
Once it is on, downloading repositories, drafting the guide and checking verification methods run automatically, which can take a few minutes. If Claude Code or GitHub is not signed in, a notice and a button to resolve it appear in the same place.
-
Turn on the switch in My agents.
-
The first time, select a folder to download repositories into.
-
When asked whether to trust the folder, click Trust and start.
Hand off a to-do to your agent
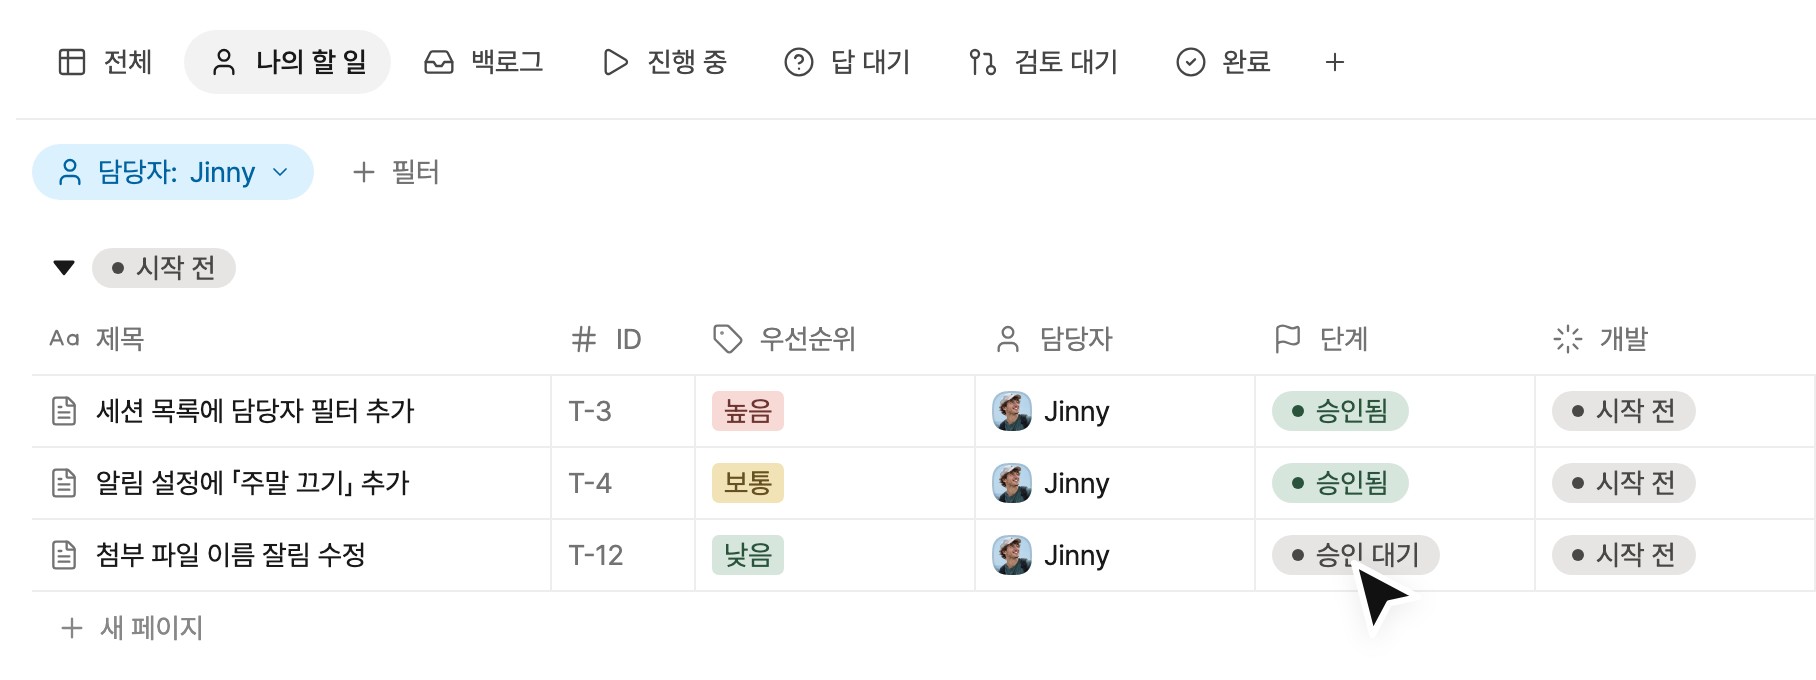
For a first try, change the stage of a sample to-do to Approved and see how it works. The agent picks it up immediately and leaves the result as a PR.
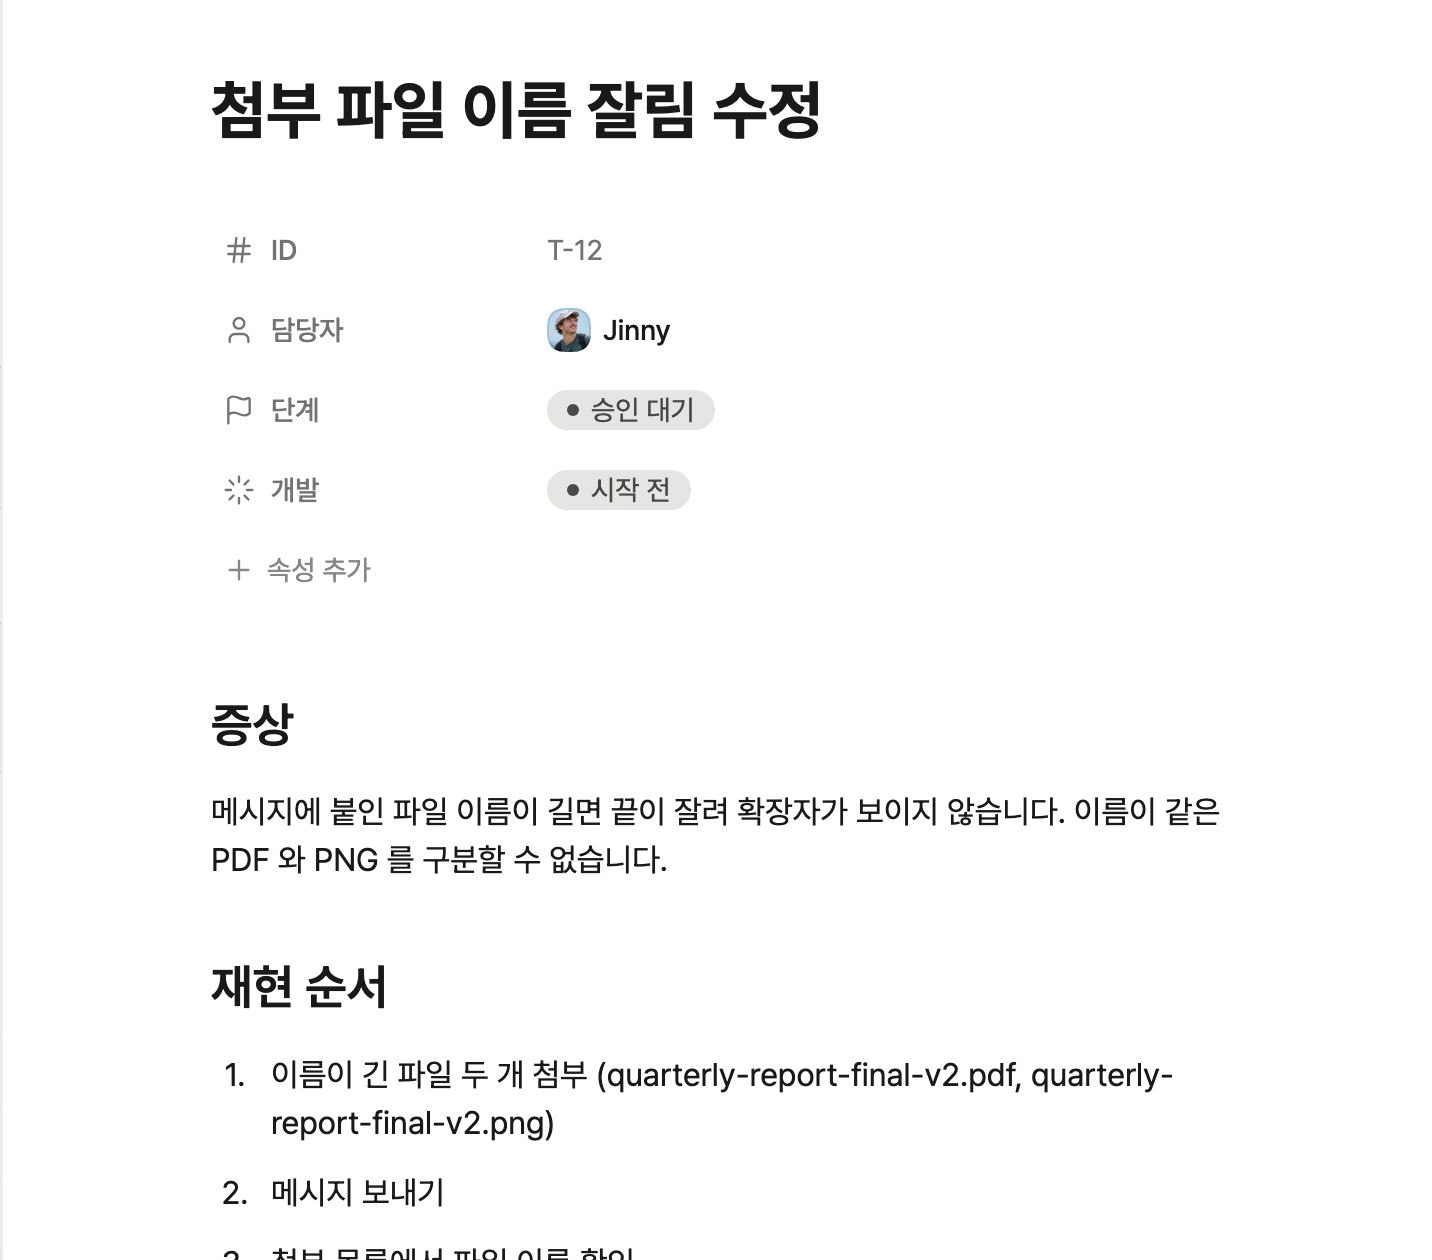
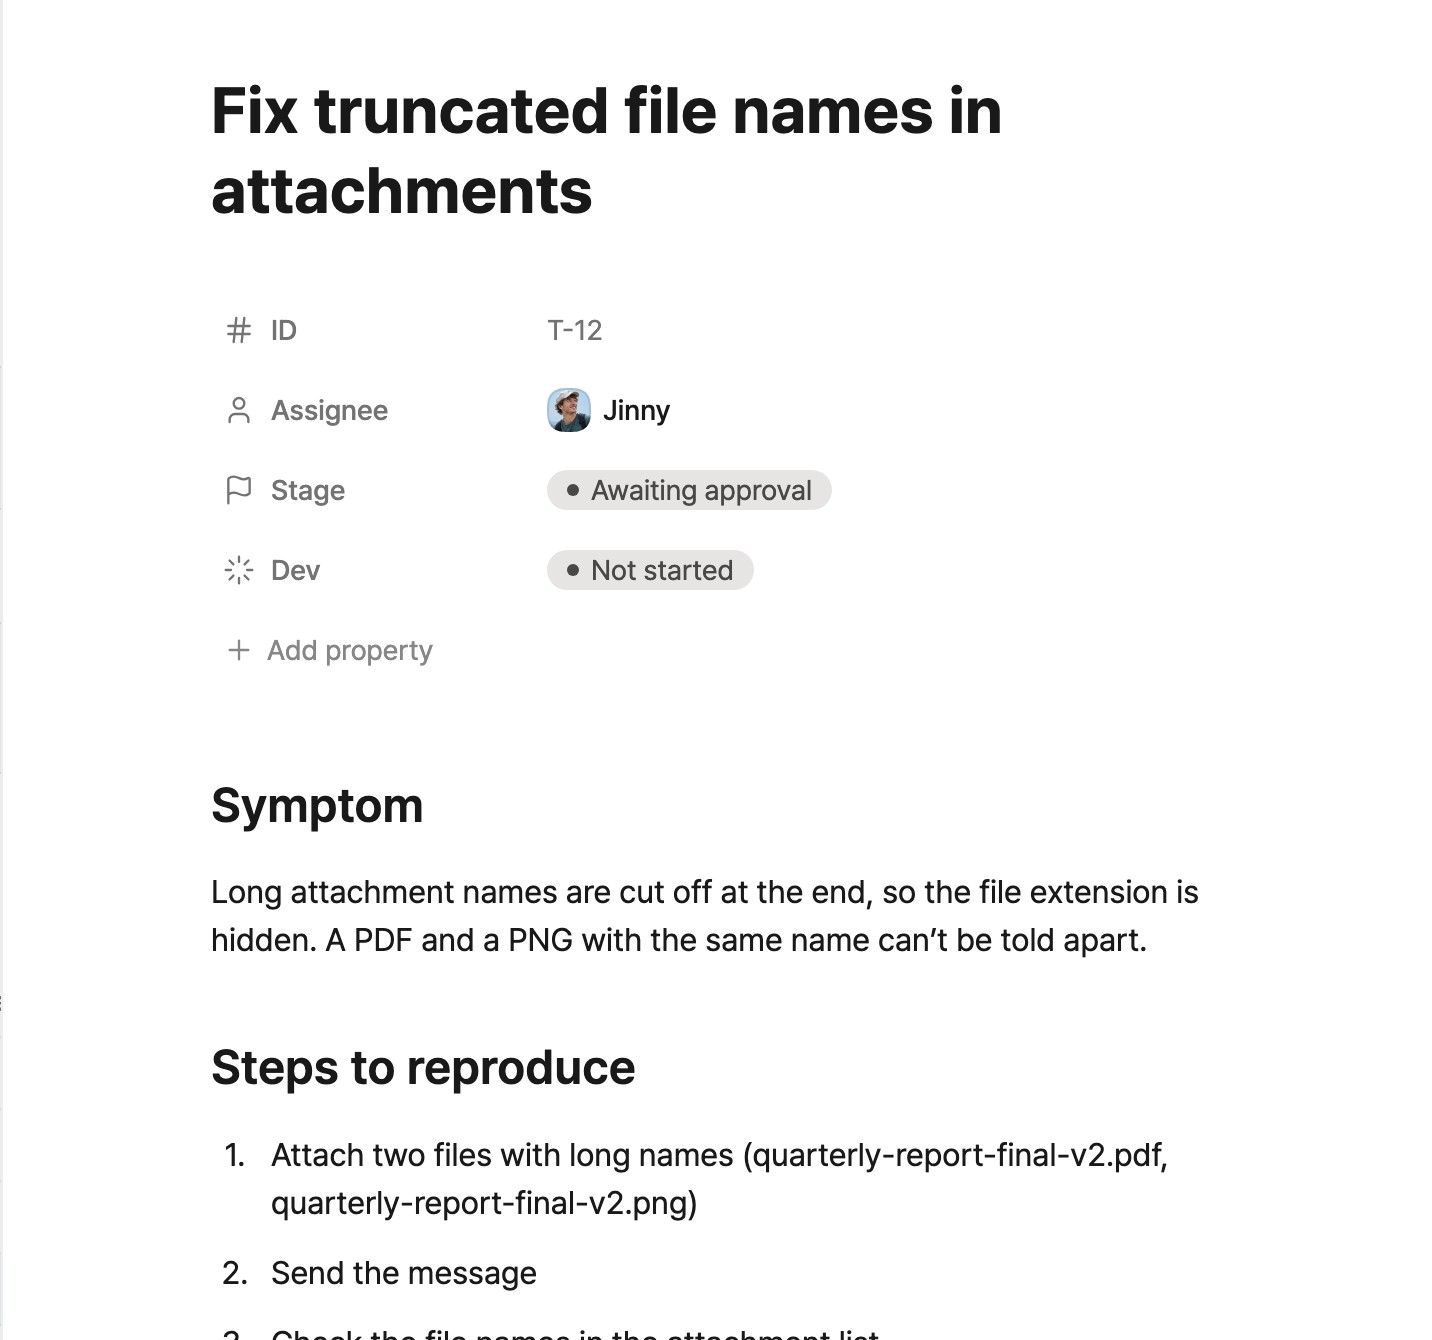
Example: a user reports that long attachment names are truncated and the file extension is not visible. The steps below show how a to-do written for this report is handled.
-
Write a to-do
Create a new to-do and describe what needs to be fixed in the body. Free-form text is enough. To cover everything, you can also use a template such as Bug report, which asks for the symptom, steps to reproduce and expected result.
-
Set the assignee
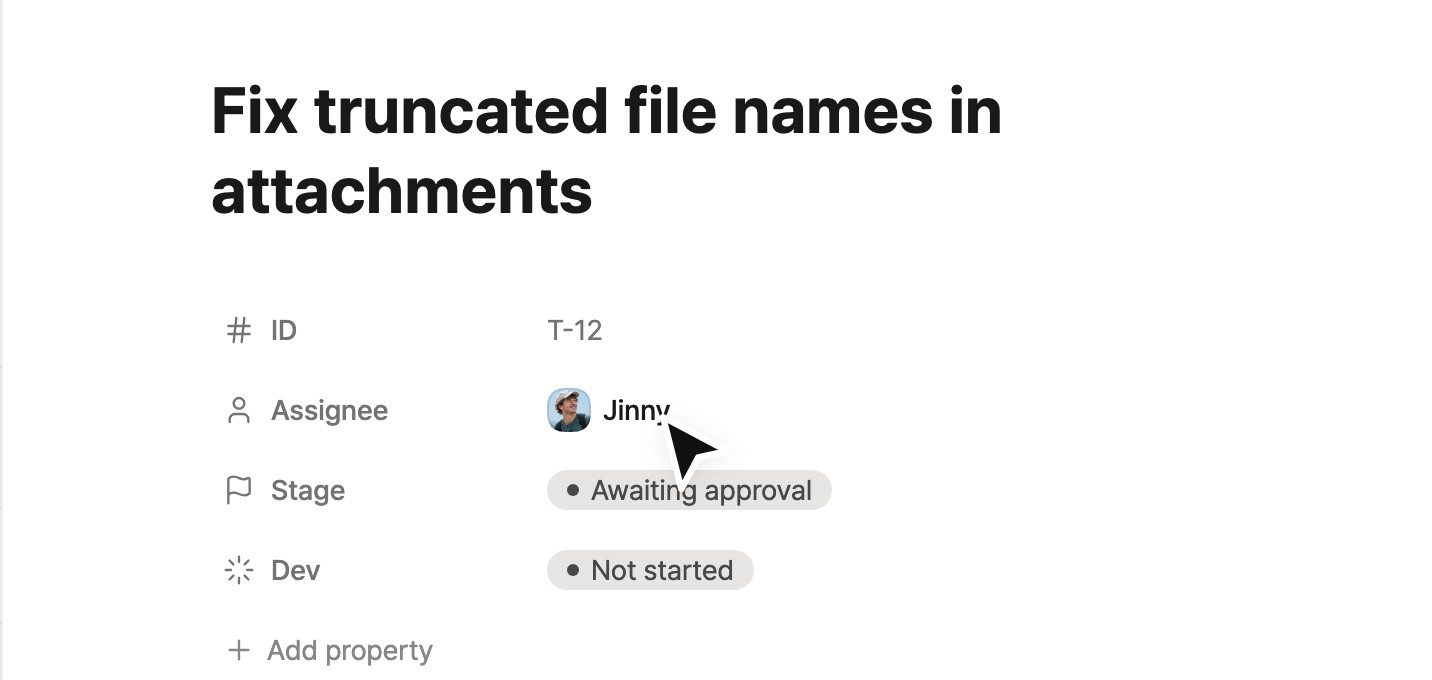
Set the Assignee of the to-do. The to-do is handled by the agent running on the assignee’s Mac.
-
Approve the to-do
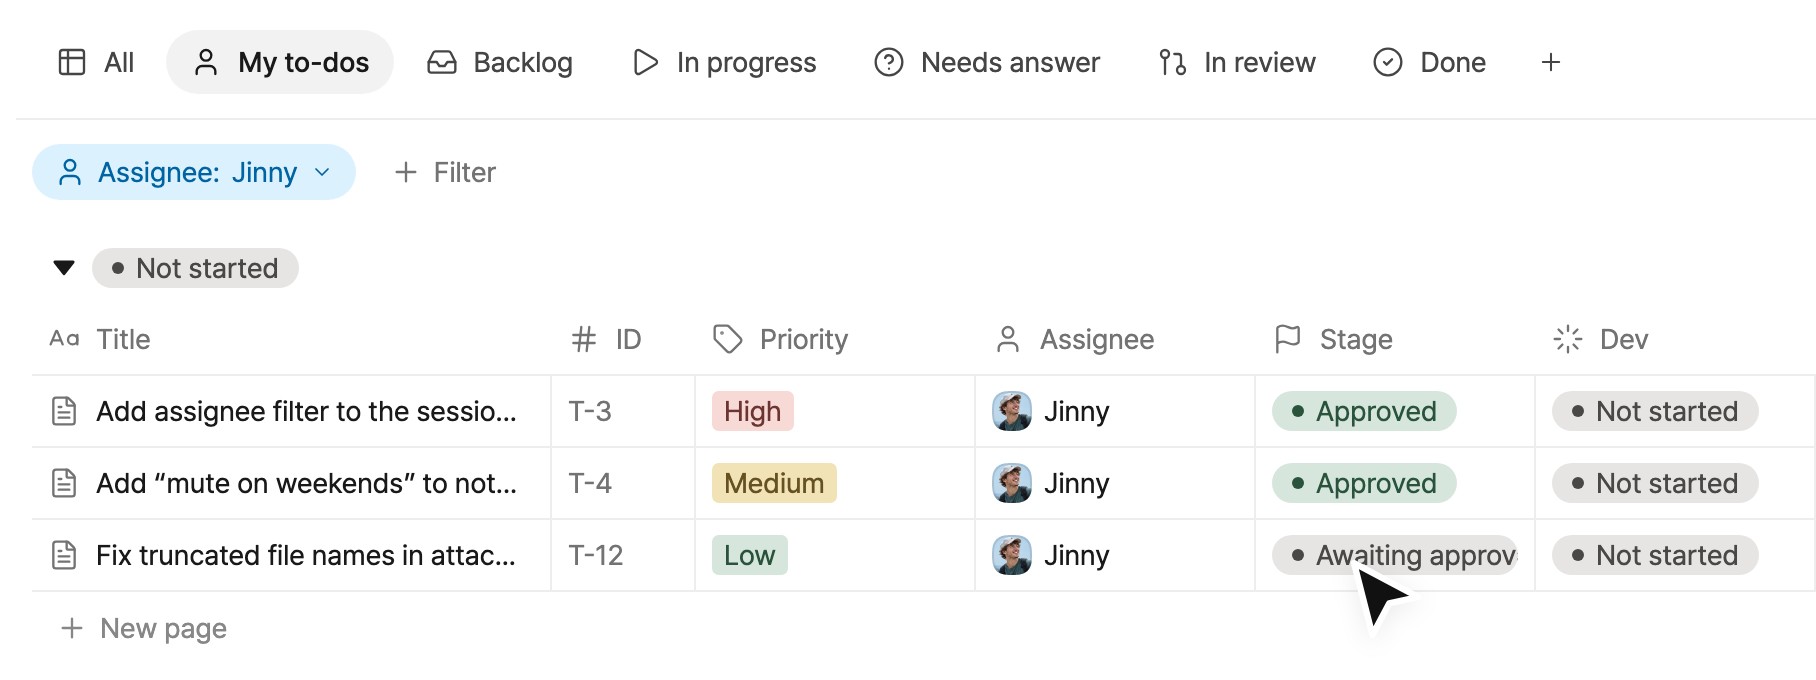
New to-dos start as Awaiting approval. Review the content and change the Stage field to Approved. The agent can then pick it up.
-
Monitor the agent’s work
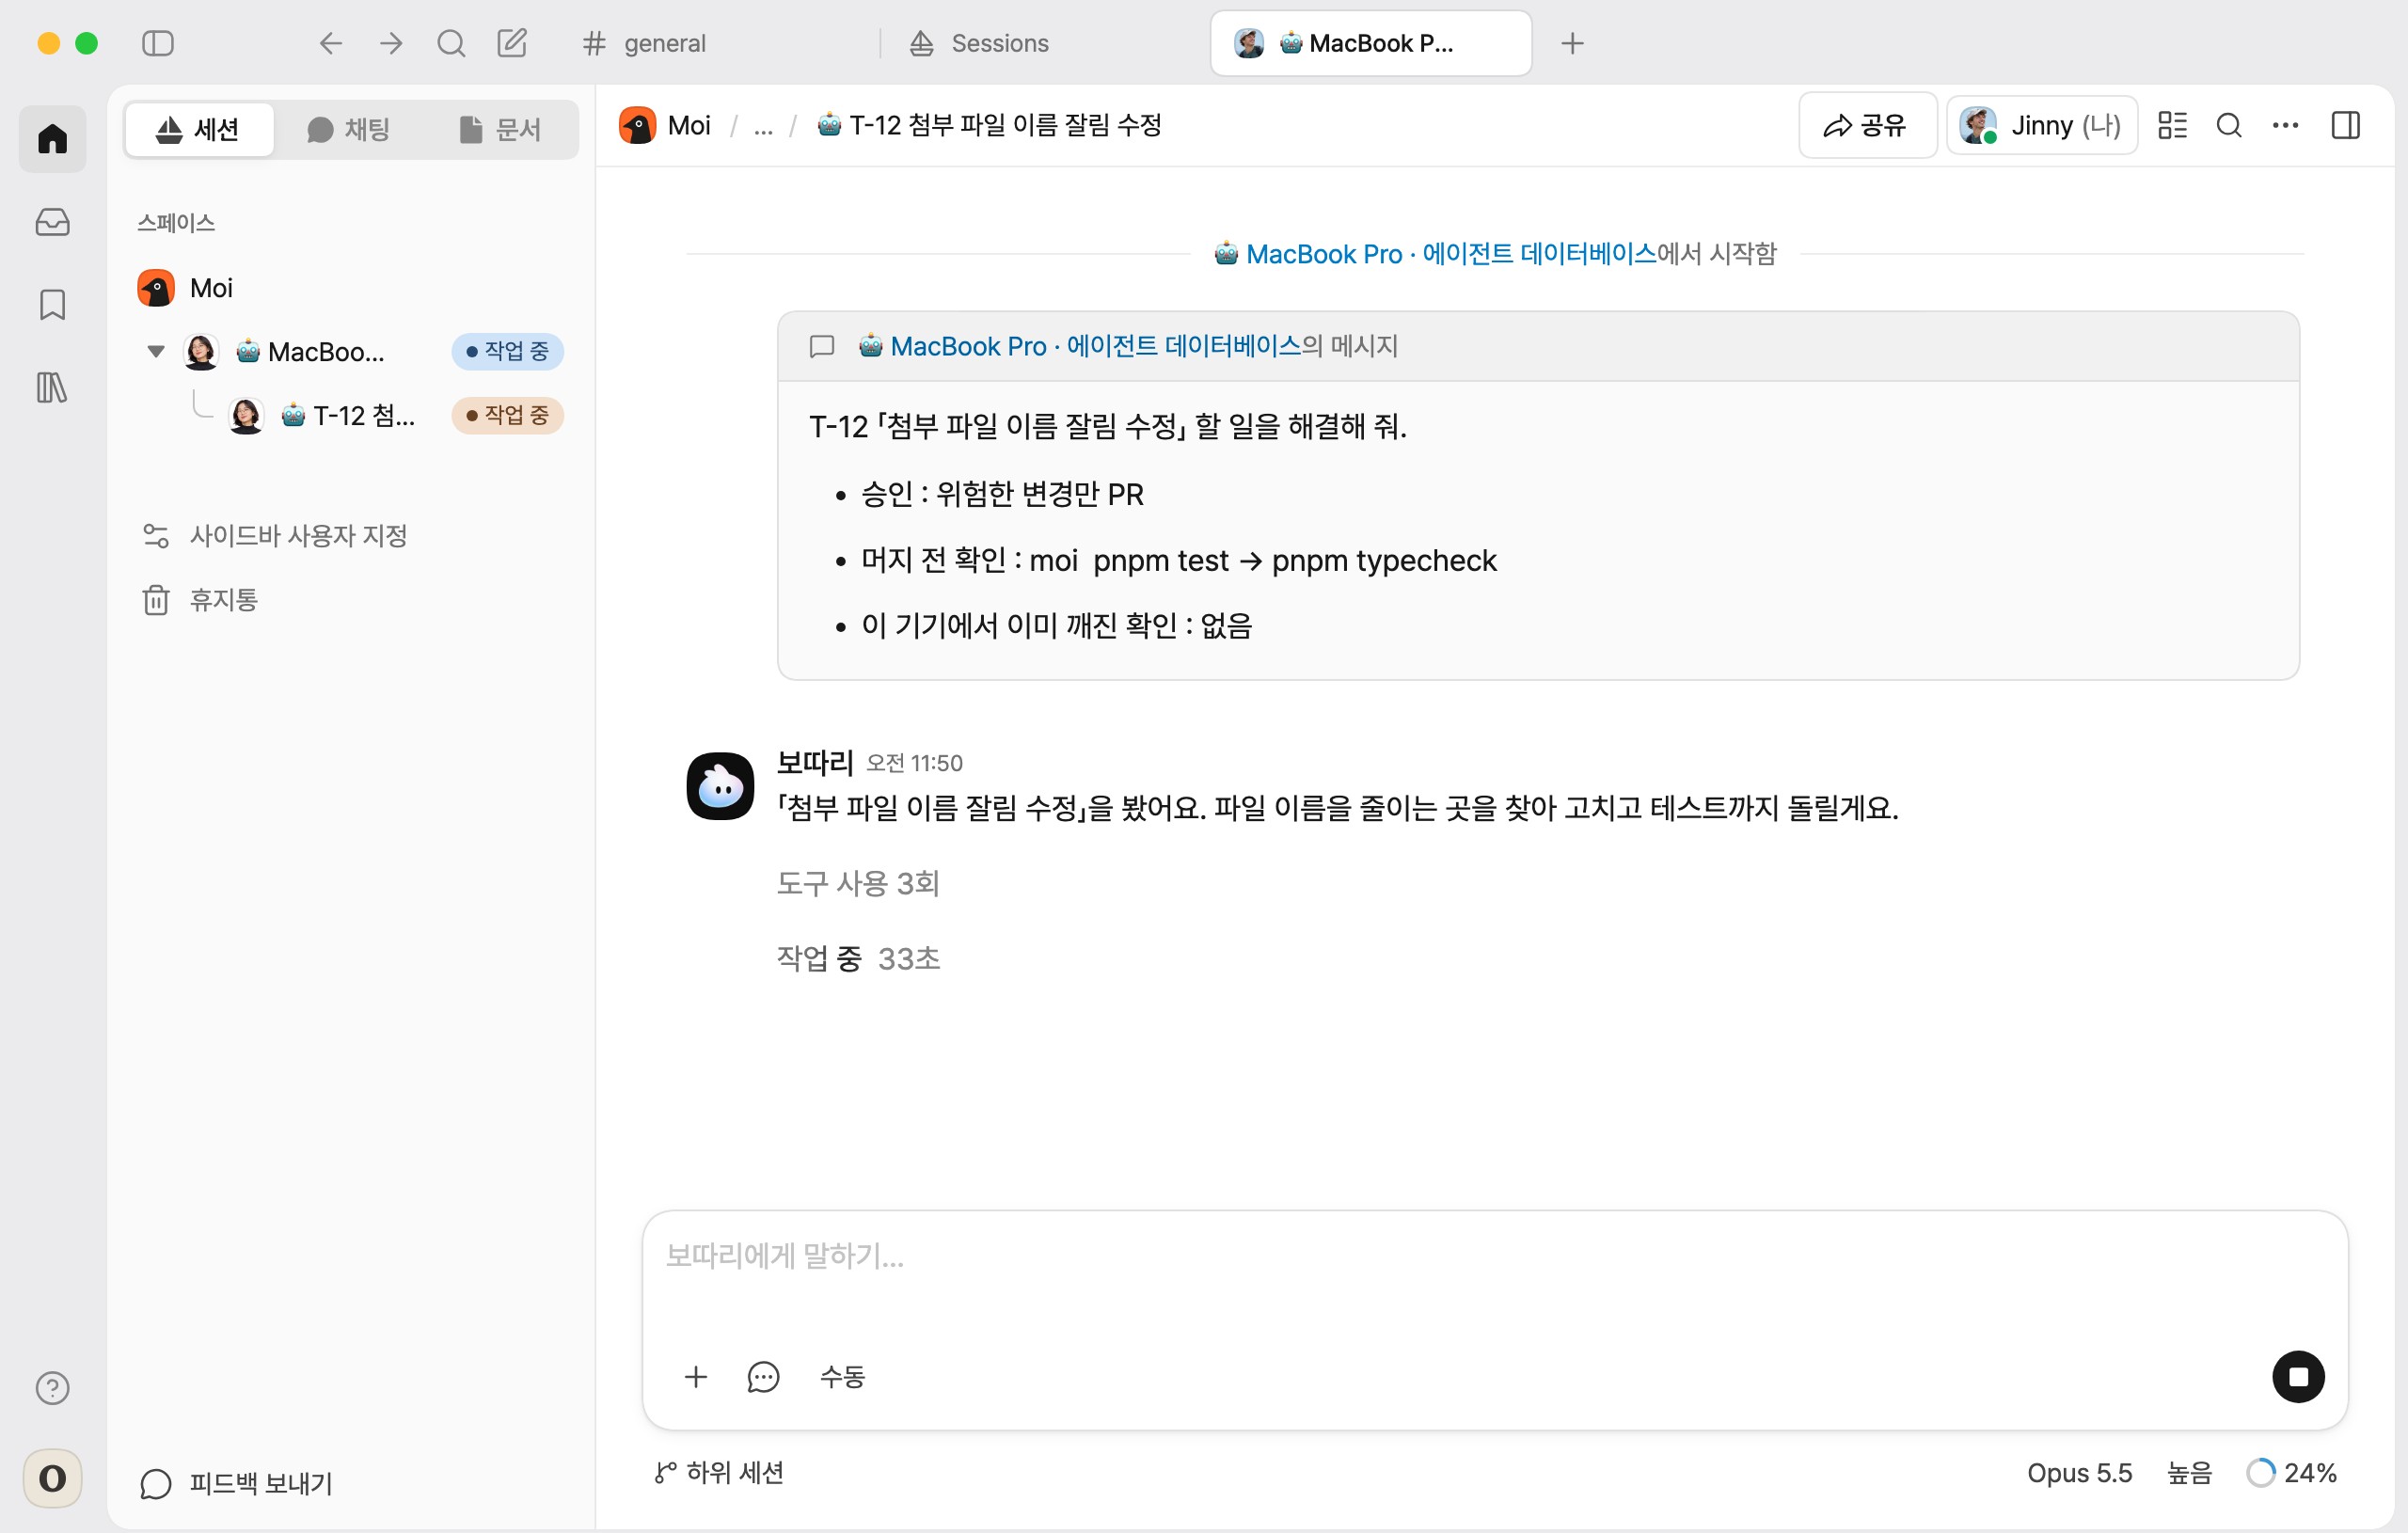
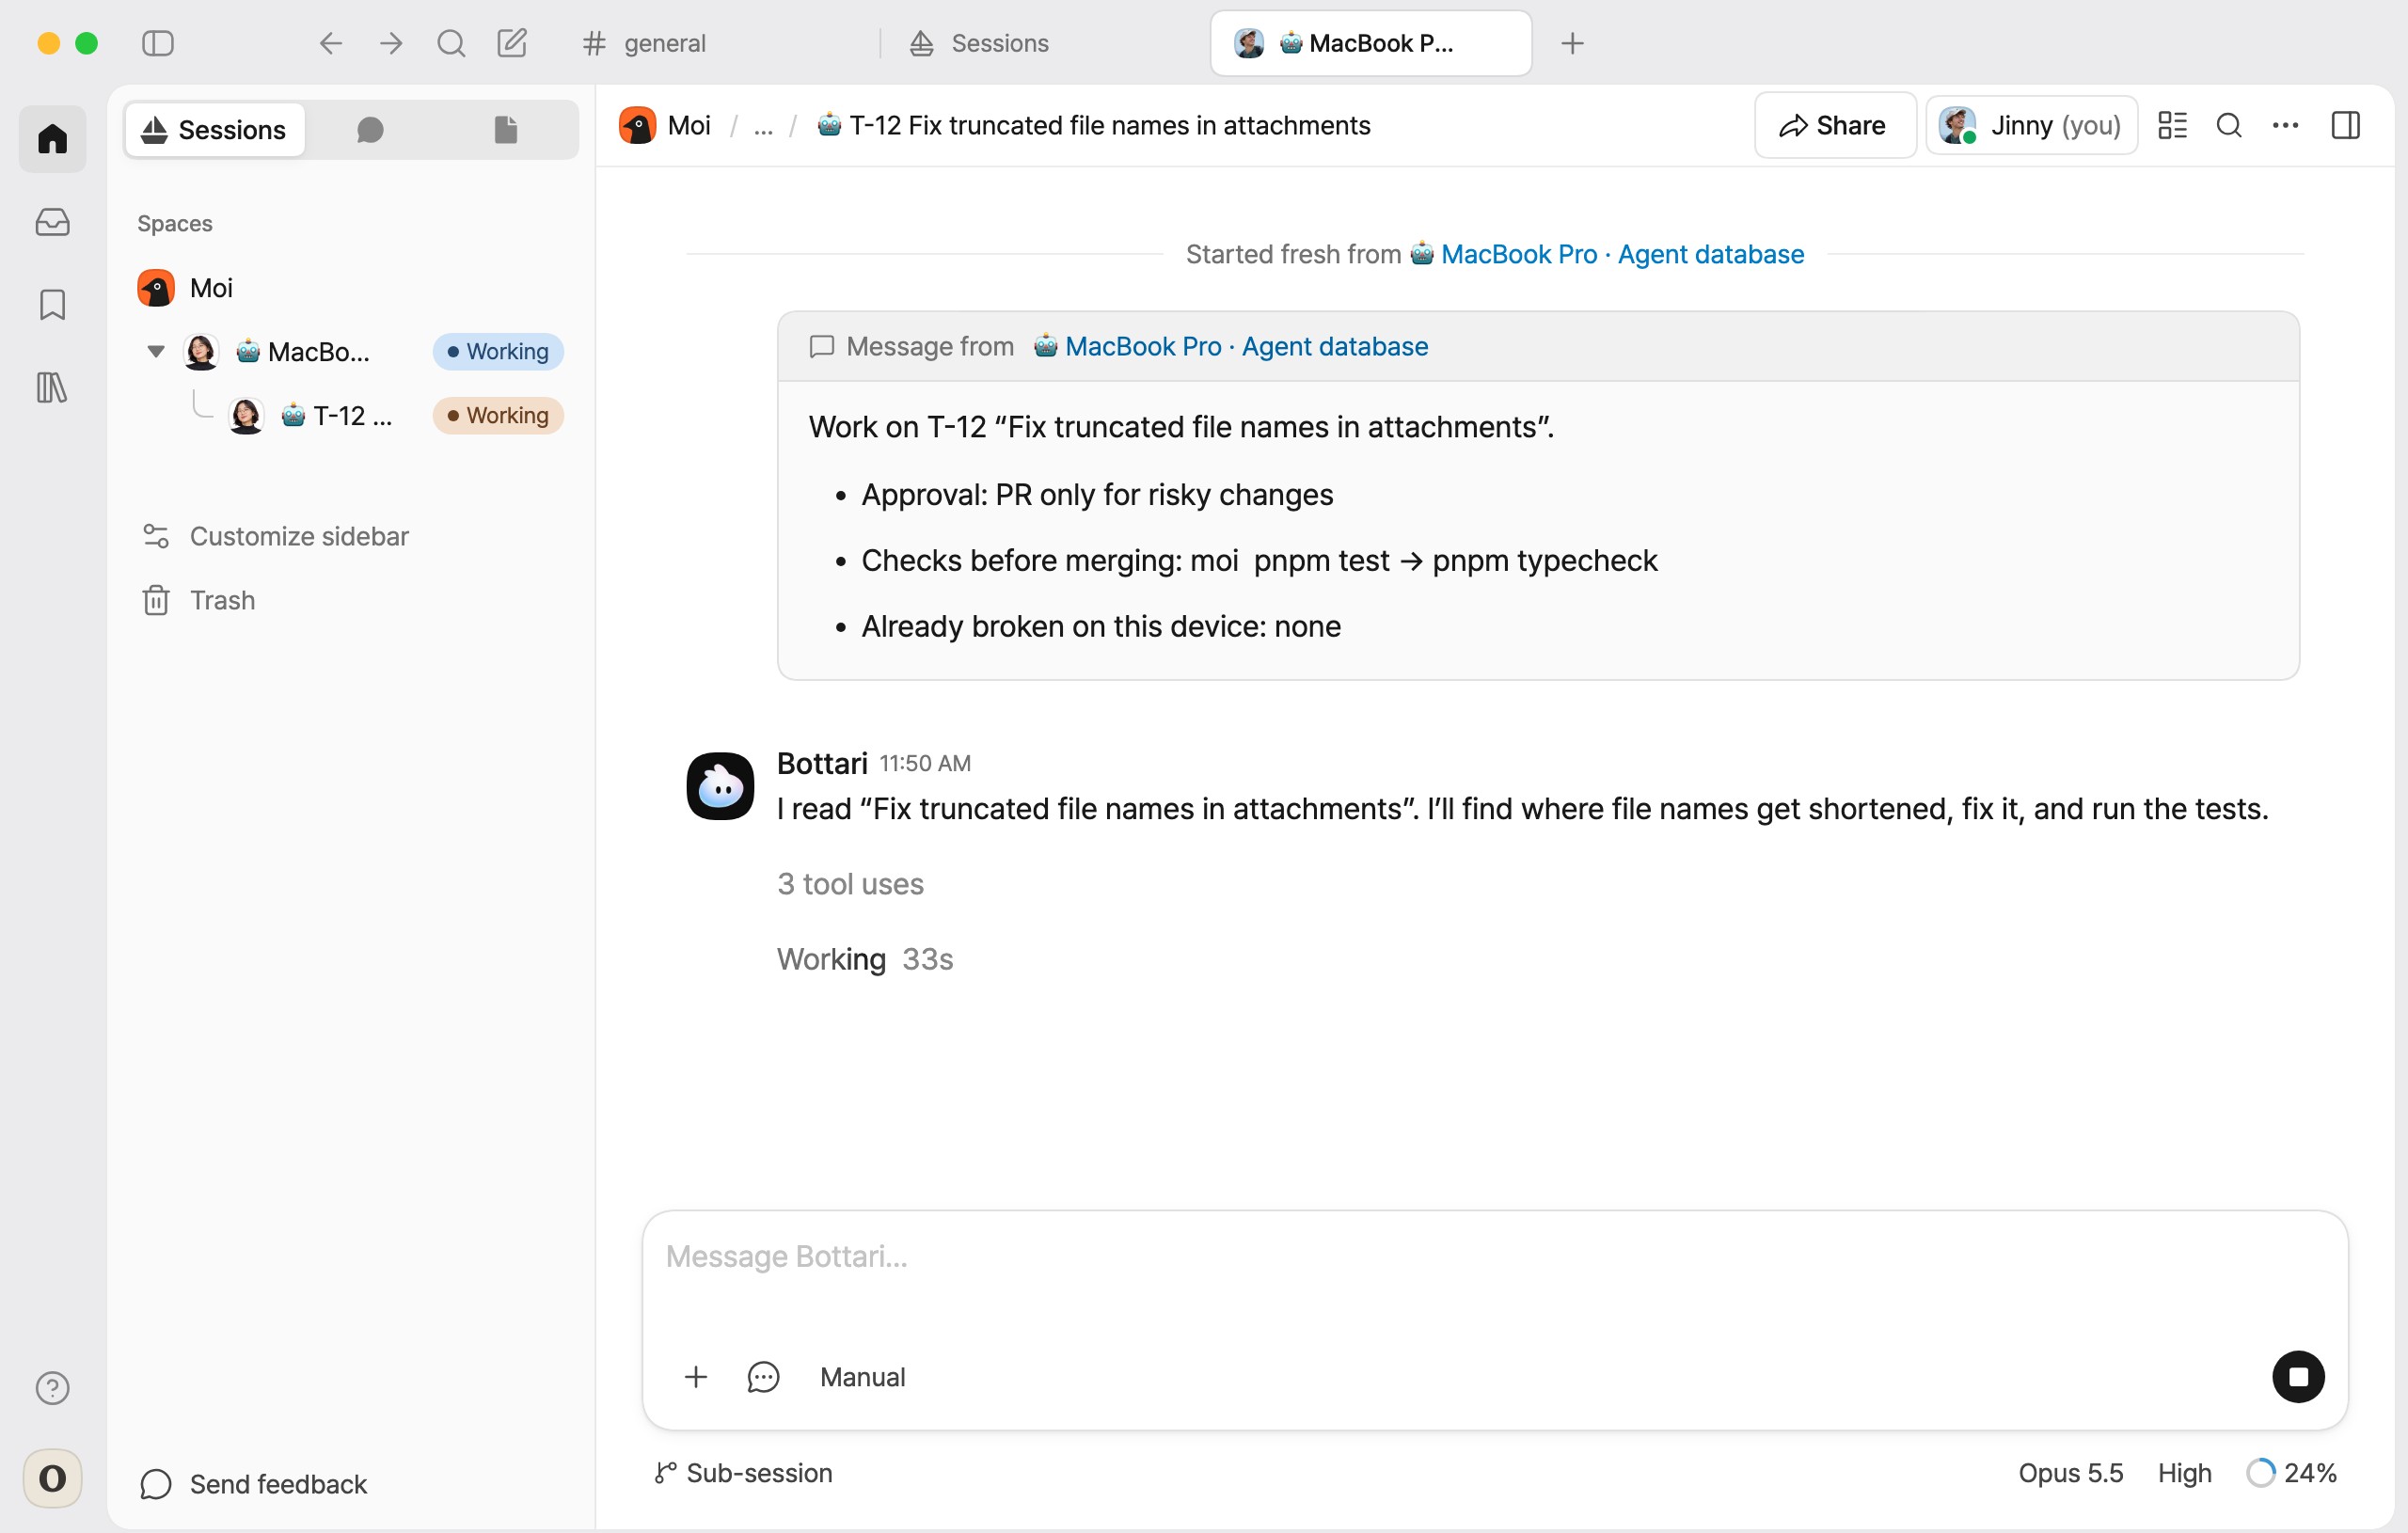
Your agent picks up approved to-dos one at a time, starting with the highest priority. To-dos without a priority are handled last. A session for your agent (🤖 device name · Agent database) appears in the sidebar, with one session per to-do beneath it. Open a to-do session to follow the agent’s planning, implementation and checks.
To start an urgent to-do immediately, enter “Do T-12 first” in your agent’s session.
-
Answer questions
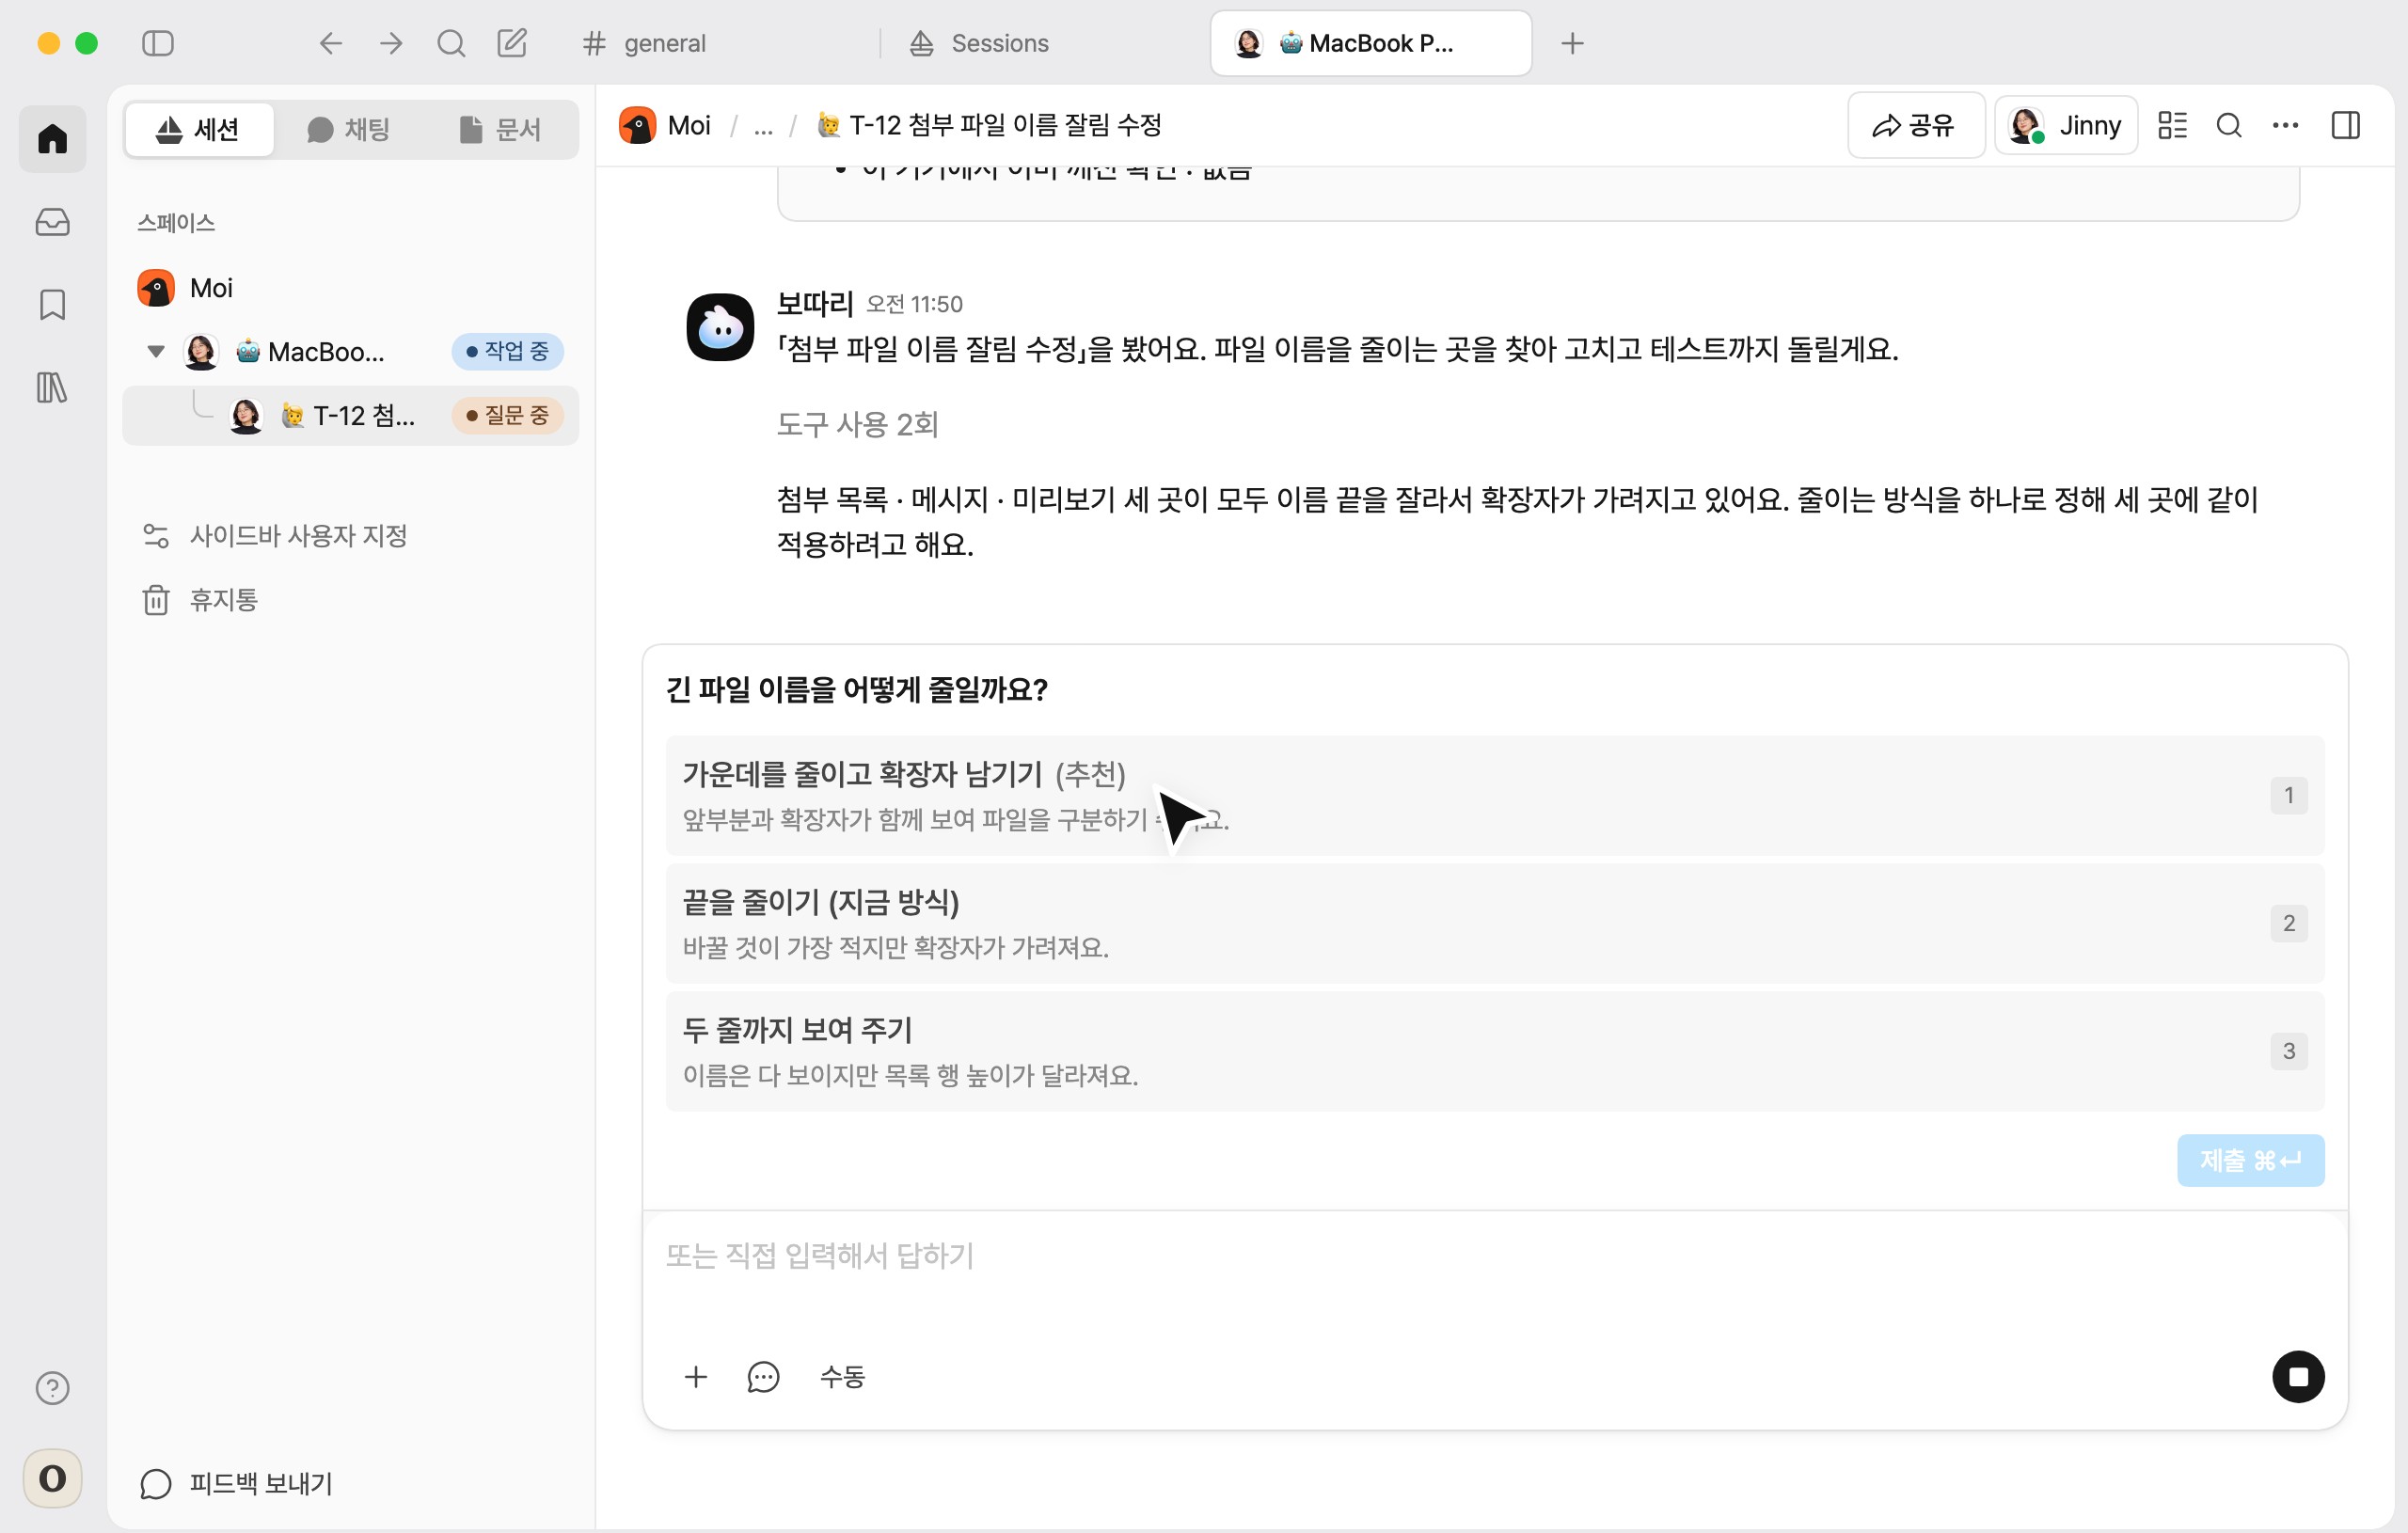
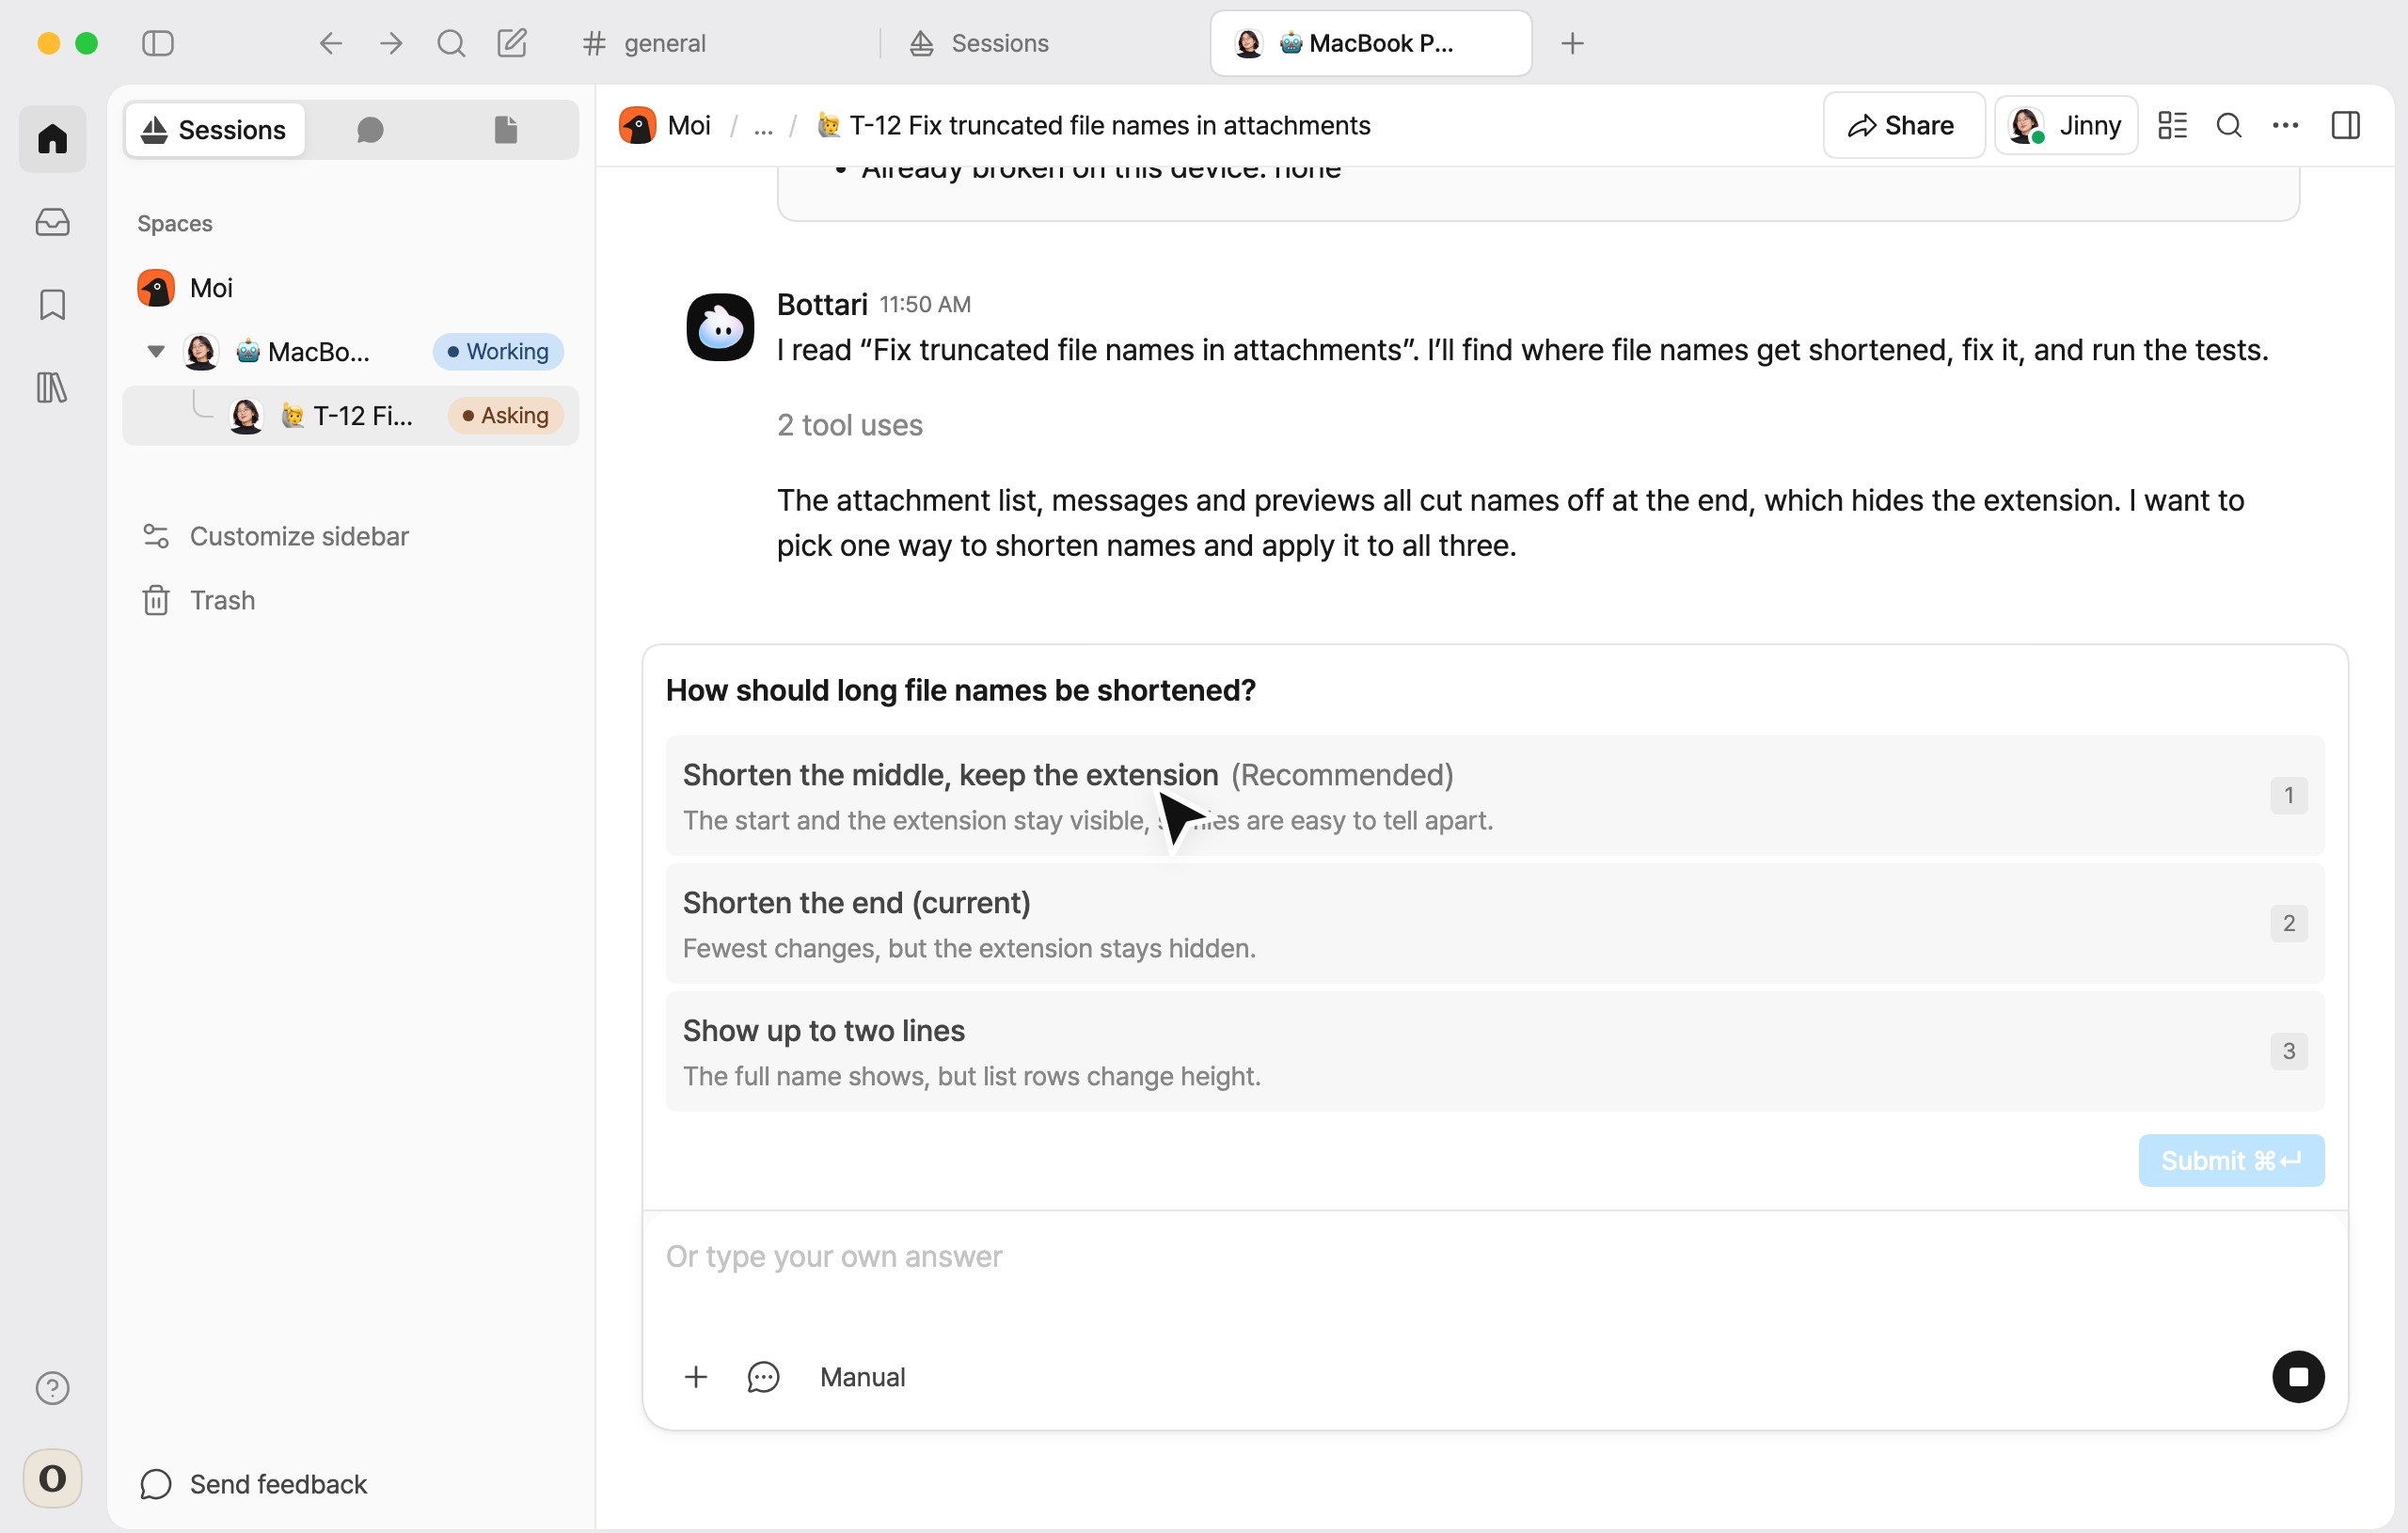
When a decision is needed, such as how to shorten long file names, the agent asks in the session and the to-do session in the sidebar shows Asking. Select an option above the input box or type your own answer, and the work continues.
Open questions are also collected in the Needs answer view of the database.
-
Review the result
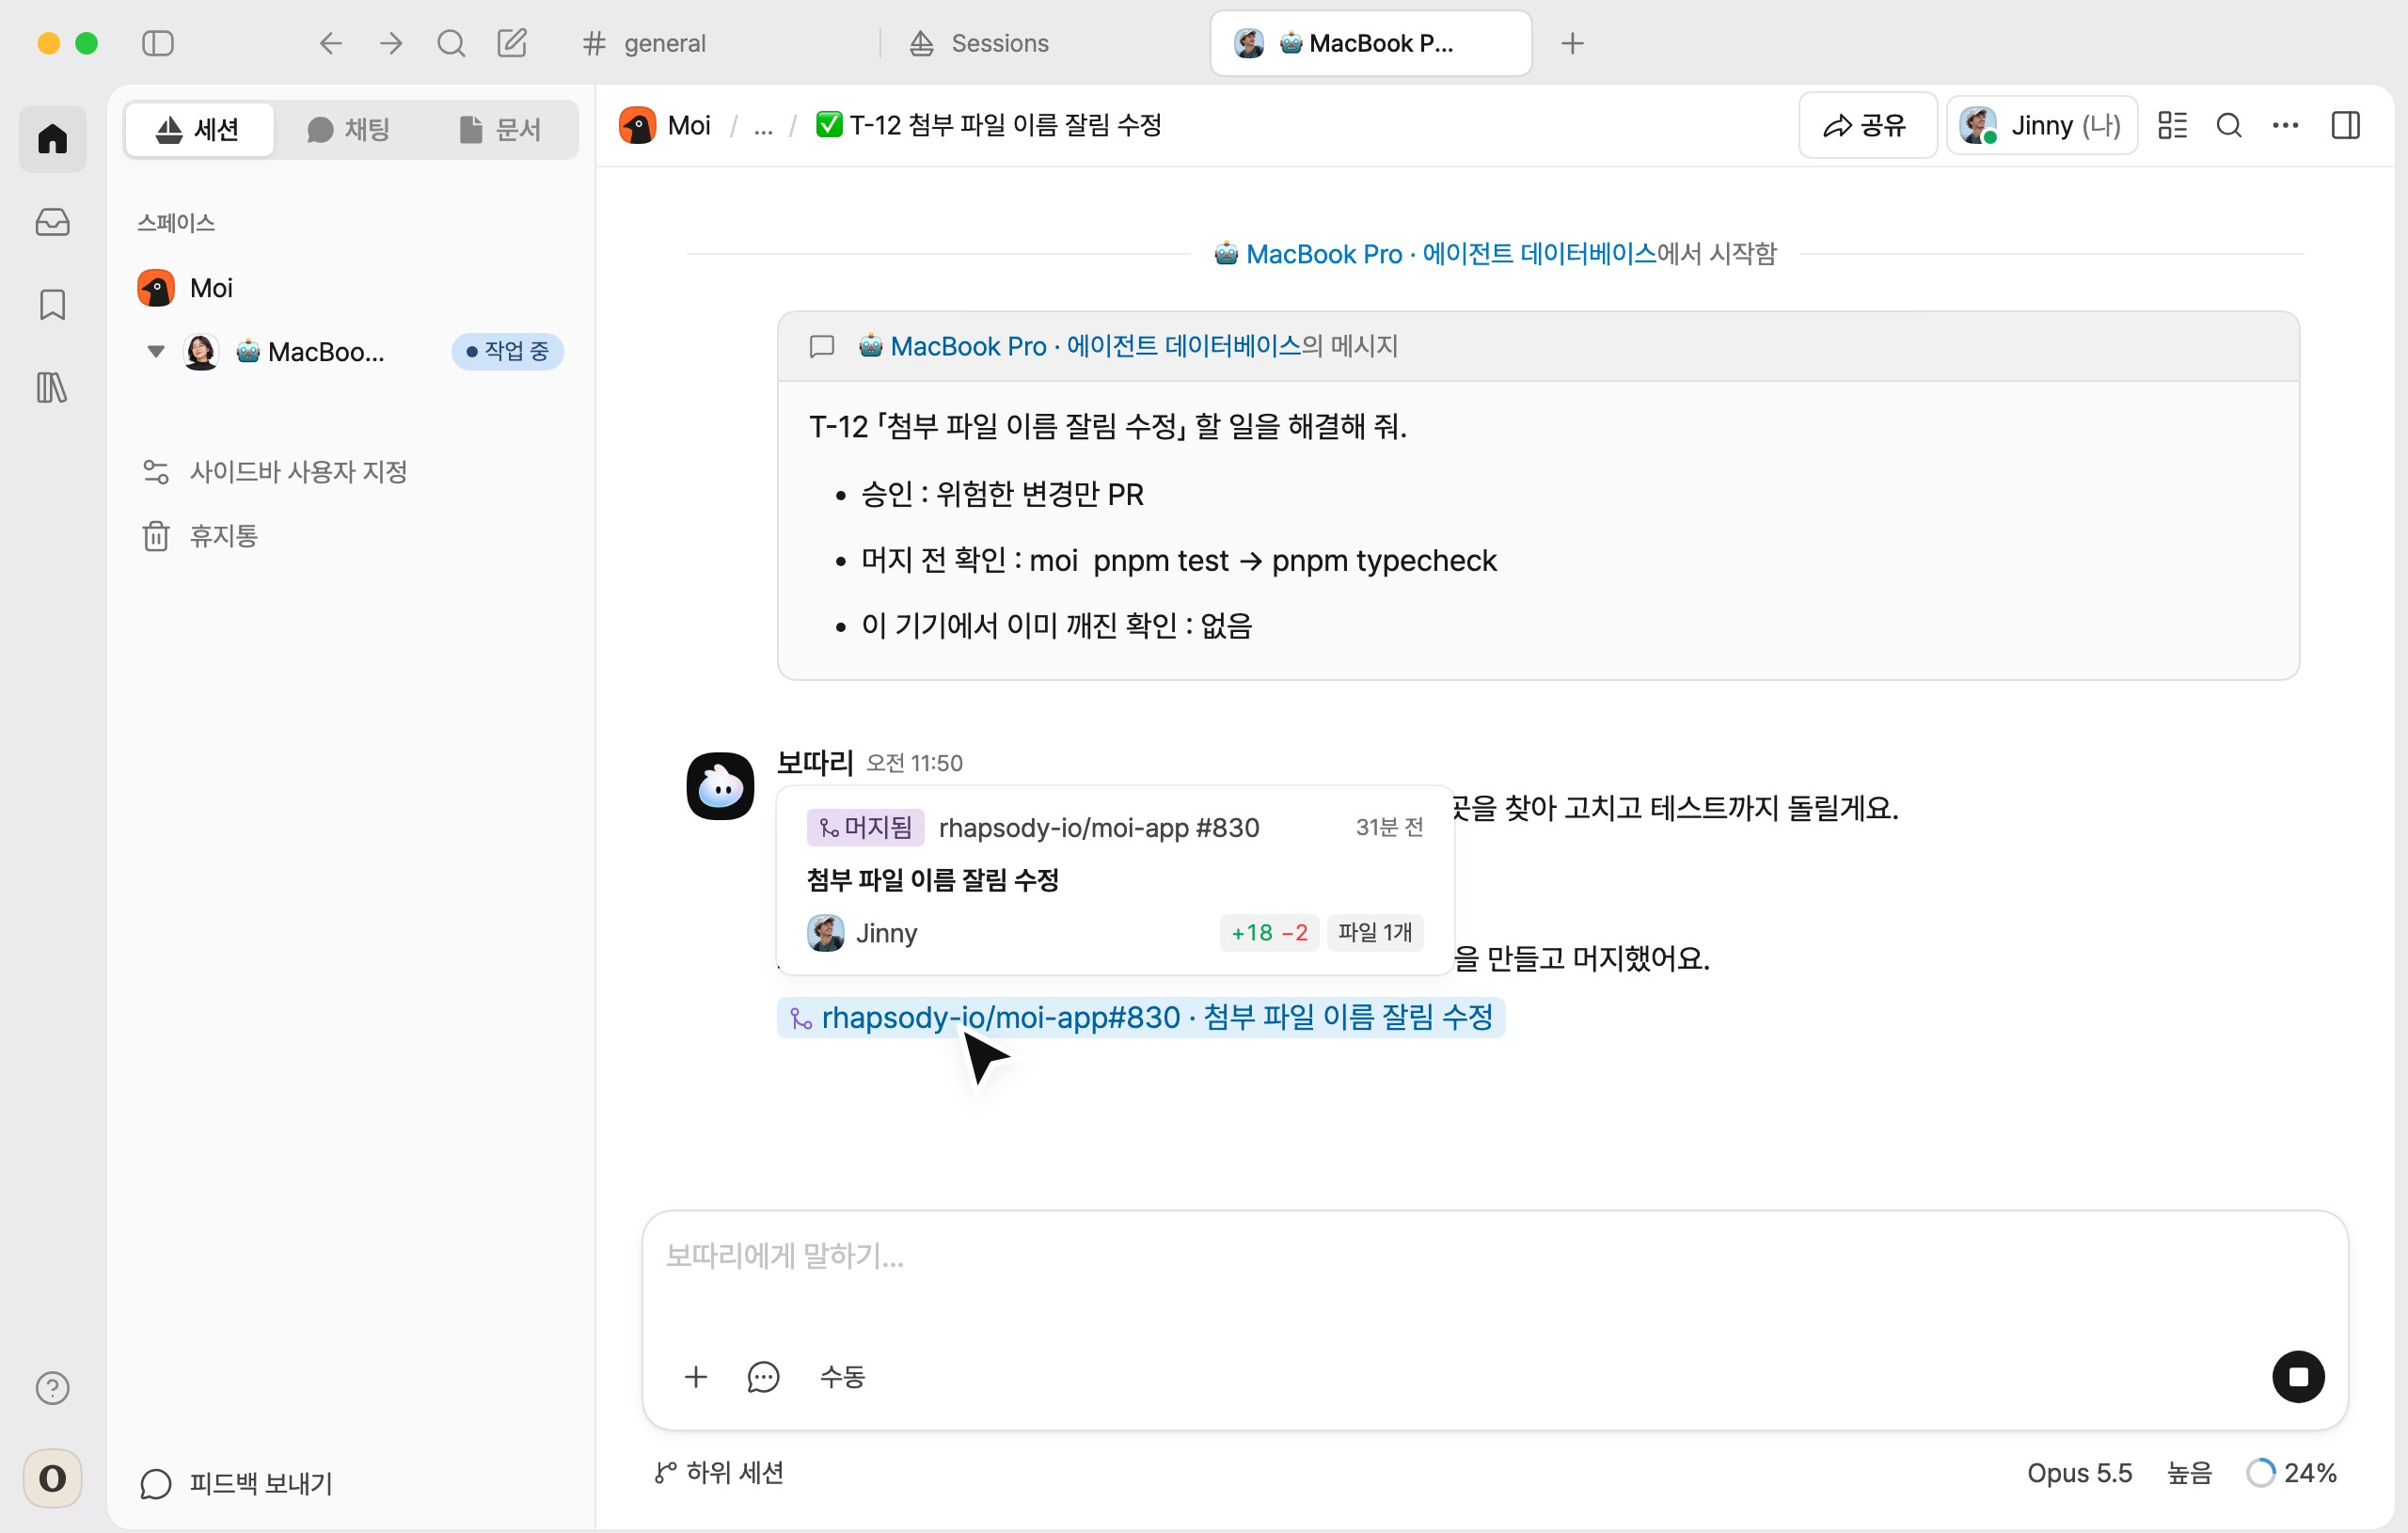
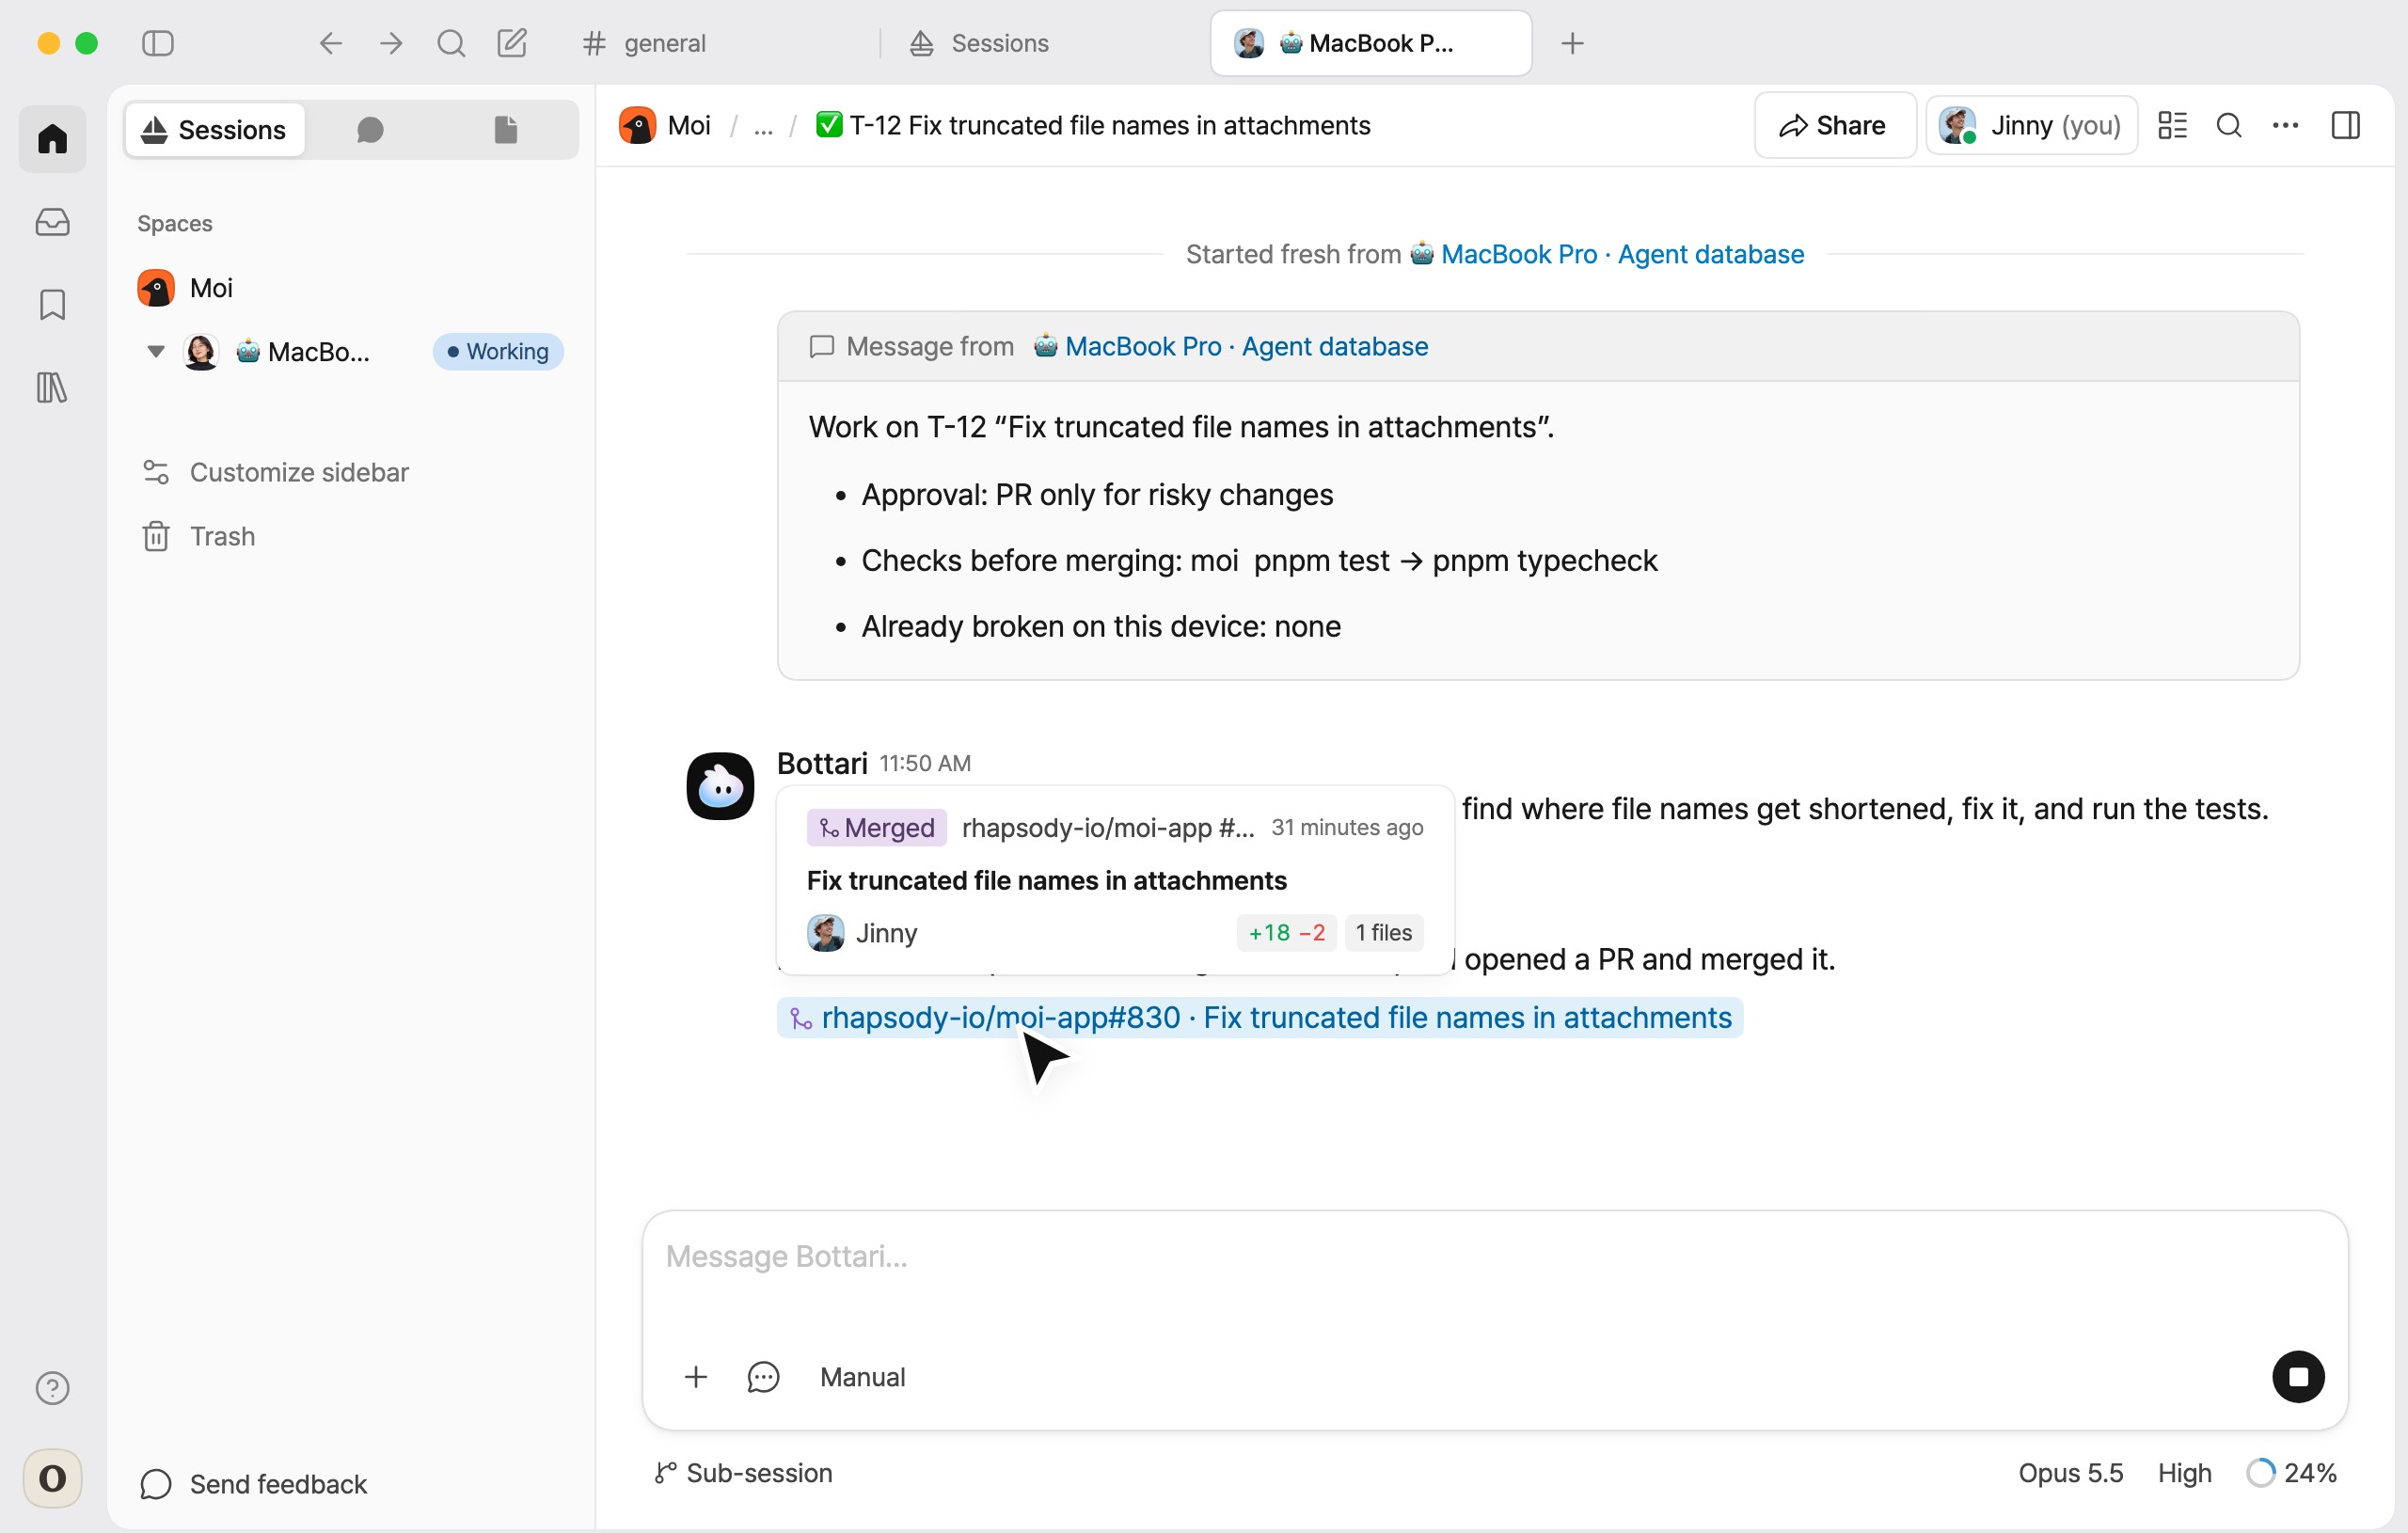
The agent runs the repository’s checks, such as tests. For an ordinary change that passes, it opens a PR, merges it and shows the PR in the session. Click the PR to see the changes on GitHub. A record of the cause, fix, checks, answers and PR is also added to the end of the to-do page.
If a change is risky, or the agent guide has no checks for the repository, a review card appears in Needs answer before merging. Merge merges it immediately. Leave the PR only keeps it in In review, and it changes to Done once the PR is merged on GitHub.
Agent settings
Open them with the settings button next to Agent guide at the top of the database. Settings apply to every agent in the database and can be changed only by space admins and people with full access to the database.
| Item | Description |
|---|---|
| Processing order | Choose priority, oldest first or due date first. |
| Repositories | Turn on the repositories the agent works in. Repositories added to the space later must be turned on here. |
| Model and reasoning effort | The model the agent uses and its reasoning effort. |
Approval policy
Selected when the database is created and changeable in the agent settings.
Under every policy, changes to files that require human review, such as dependencies, migrations and CI, and changes that are hard to undo or significantly change direction are sent to a review card.
| Policy | Agent behavior | What the user reviews |
|---|---|---|
| PR only for risky changes | Merges ordinary changes and sends risky changes to a review card | Review cards for risky changes |
| Always PR only | Opens a PR for every change and leaves merging to the user | All review cards |
| Always merge | Merges once the checks pass | Merged results |
Agent guide
The agent guide is the set of rules the agent follows for each repository. Open it with the Agent guide button at the top of the database. A draft is written automatically; on a new Mac, it is written the first time the agent is turned on.
The guide can be edited like any document. Admins can also use Update the guide to have the agent revise it.
| Item | Description |
|---|---|
| How each repository is checked | The test commands the agent runs before merging. If empty, even ordinary changes are not merged automatically and are sent to a review card. |
| Areas to be careful with | Paths that require human review. Under PR only for risky changes, changes to these paths are treated as risky. |
Limitations
- The agent does not pick up to-dos that have not been approved.
- Editing the title or body after approval removes the approval. The to-do must be approved again.
- The agent does not work while the Mac is off.
For further questions, contact support@bottari.ai.